Ready to transform your digital art, game environments, or architectural renders with breathtaking realism and creativity? The secret weapon many pros are now wielding are AI-powered texture generators. Forget endlessly searching for the perfect seamless texture or spending hours meticulously crafting one from scratch. With step-by-step guides to using texture generators, you can unlock an entirely new level of visual fidelity and artistic freedom, all at the speed of thought.
These intelligent tools leverage machine learning to conjure high-quality textures from simple text prompts or a reference image, understanding intricate details like lighting, depth, and material properties. From the rough grain of ancient wood to the polished sheen of futuristic metal, the possibilities are virtually limitless.
At a Glance: Your Journey to AI-Generated Textures
- Understand the Power: See how AI texture generators save time and spark creativity across industries like gaming, architecture, and social media.
- Prepare for Success: Learn the crucial prerequisites, from tool selection to crafting effective prompts.
- Master Scenario: Dive into a detailed, step-by-step walkthrough of this powerful, professional-grade texture generator.
- Explore Spellai: Get started quickly with a beginner-friendly guide to generating textures with ease.
- Elevate Your Craft: Discover pro tips and best practices to refine your textures and achieve stunning results.
Why AI Texture Generators Are Your Creative Superpower
In today's fast-paced digital landscape, efficiency and visual quality are paramount. AI texture generators aren't just a novelty; they're a transformative technology offering substantial benefits for anyone working with digital visuals. Think of them as your personal material scientist, capable of inventing new surfaces or perfectly replicating existing ones in mere seconds.
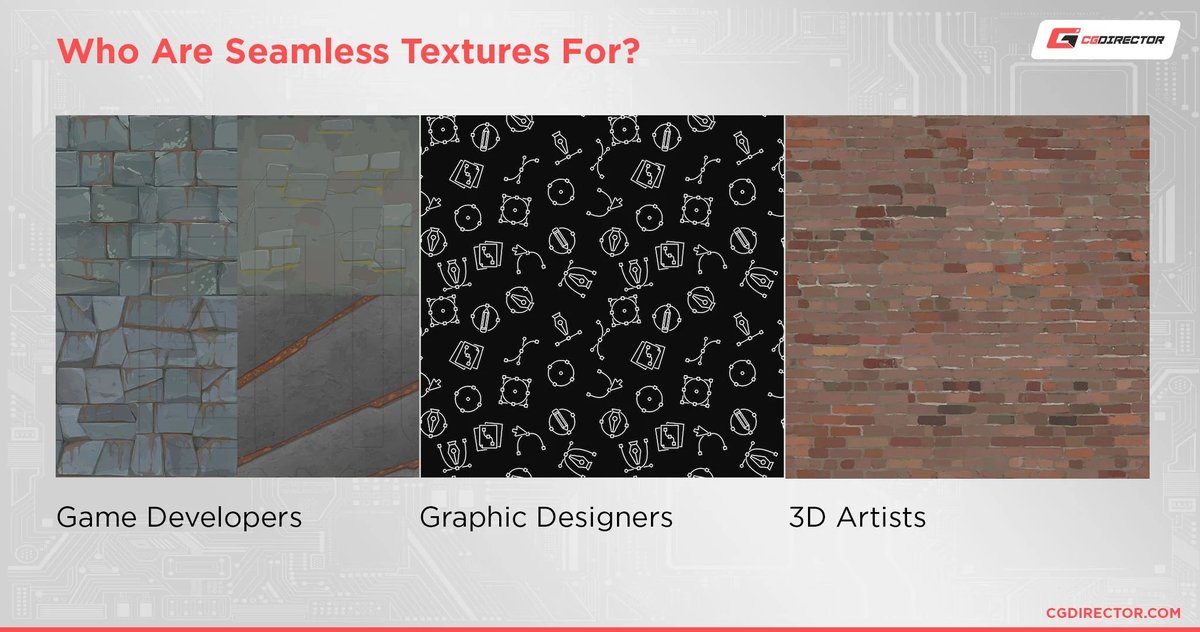
- Game Developers: Imagine populating vast open worlds or intricate dungeons with unique, seamless textures generated on the fly. AI tools enable rapid iteration and ensure your 3D assets and environments look consistent and compelling.
- Concept Artists: Break through creative blocks by quickly exploring diverse material styles and surface types. AI can serve as a powerful brainstorming partner, helping you visualize concepts that might otherwise take days to render manually.
- Architecture and Scene Building: Design realistic textures for everything from a grand facade to the subtle weave of a sofa fabric. These generators empower you to visualize interior and exterior designs with unparalleled realism, bringing blueprints to life.
- Social Media Content Creators: Elevate your posts with unique backgrounds, visual overlays, and customizable templates. AI-generated textures add a distinct, professional flair to your digital presence.
- Time and Resource Saving: Perhaps the most compelling benefit is the sheer efficiency. Custom, high-resolution textures can be created rapidly, drastically reducing production costs and freeing up valuable artist time for more complex tasks. It's like having an infinite library of materials at your fingertips, updated in real-time.
Getting Started: The Essentials Before You Generate
Before you dive headfirst into the exciting world of AI texture generation, a little preparation goes a long way. Think of these as your launch checklist, ensuring a smooth and successful creative flight.
- Tool Selection: Start by choosing an AI tool that fits your skill level and project needs. For beginners, a clear interface and straightforward export options are key. We'll explore two popular options shortly.
- Clear Concept: What exactly are you trying to create? Having a precise idea of your desired texture, perhaps even with visual references, will guide your generation process. A fuzzy vision often leads to fuzzy results.
- Effective Prompts: This is where the magic happens. Crafting detailed text prompts that describe the texture type, material, color, and any specific characteristics is crucial. The AI is only as good as the instructions you give it.
- Output Specifications: Consider the end use for your texture. Do you need high resolution for a cinematic render or optimized tiling for a game engine? Knowing your requirements upfront will help you adjust settings and export formats.
- Stable Internet Connection: Most advanced AI texture generators operate in the cloud, leveraging powerful remote servers. A stable internet connection is essential for a seamless and responsive experience.
With these prerequisites in mind, you're ready to explore the exciting capabilities of AI texture generation. Let's get hands-on with some practical examples.
Deep Dive: Your First Steps with Scenario (A Pro-Grade Tool)
Scenario is a robust platform specifically engineered for generating high-quality, seamless textures, making it a favorite for games, animations, architectural renders, and digital art. Its array of features and models allows for both broad exploration and precise control.
Accessing Texture Generation in Scenario
Getting to the texture generation interface is straightforward:
- Log in to your account at
app.scenario.com. - Navigate to the left panel and click on "Textures."
- Then, click the "+New" button.
- Alternatively, if you're already in the Texture Gallery, you can click the prominent blue "+ New Texture" button located in the top right corner of the screen.
Understanding the Scenario Texture Generation Interface
Once you're in the generation area, you'll notice a well-organized interface designed for clarity and control:
- A) Model Selection (top left): This dropdown menu is your gateway to different AI models, each trained for specific styles or types of textures. You might find options like "Realistic Textures 2.0" here.
- B) Prompt and Prompt Tools (below model selection): This is where you'll type your descriptive text. Below the prompt box, you'll find helpful icons, often called "Prompt Spark tools," to assist you in refining your ideas.
- C) Settings (bottom left): This panel allows you to fine-tune various generation parameters, such as the number of textures you want and the complexity of the AI's rendering process.
Step-by-Step Guide to Generating Textures with Scenario
Follow these steps to bring your texture ideas to life:
1. Choose a Texture Model
The model you select significantly influences the output. Scenario offers several specialized options:
- Available Models: Look for models tailored for specific patterns (e.g., a "Wooden Floors" model for flooring, a "Stone Walls" model, or "Terracotta Roofs"). You'll also find style-focused options like "Realistic Textures 2.0" for lifelike details or "Lineart Textures" for clearly defined outlines, perfect for a stylized look.
- Custom Models: For truly unique or branded textures, you can train your own model. This involves uploading 10-50 images that exemplify your desired aesthetic, then tagging it specifically as "Texture." This is incredibly powerful for maintaining a consistent visual language across projects.
2. Craft a Prompt
Your prompt is the blueprint for your texture. The more detailed and descriptive it is, the better the AI can interpret your vision.
- Be Specific: Instead of "stone wall," try something like: "An ancient stone wall, composed of large, timeworn limestone blocks arranged in a sturdy formation, displaying erosion with gray and sandy tones, with moss between the stones." Focus on materials, colors, age, and key surface details.
- Leverage Prompt Spark Tools: Below the prompt box, you'll find helpful icons. These tools can generate new ideas if you're stuck, expand short descriptions into richer narratives, translate prompts into English if you're working in another language, or even convert an image into a prompt to kickstart your creative process.
3. Adjust Settings
The settings panel gives you granular control over the generation process. It's often best to start with default settings and make incremental adjustments.
- Texture Count: This determines how many variations the AI will generate in a single batch. The default is usually 4, but you can adjust it between 1 and 8 to get more options or focus on fewer, higher-quality results.
- Sampling Steps: This parameter controls the number of iterations the AI takes to refine the texture. For "Flux" models, the default is 28. Increasing this value can lead to more intricate details and higher fidelity, while decreasing it will result in faster (but potentially less detailed) generations.
- Guidance: This setting dictates how strictly the AI adheres to your prompt.
- For "Flux" models, the default is 3.5. Increasing it to 5 will make the AI follow your prompt more tightly, while lowering it to 3 allows for more creative interpretation and unexpected variations.
- For "Stable Diffusion" (SDXL) models, keep values between 6 and 12 for optimal results.
- Seed: Leaving this as "Random" will generate different textures each time. If you find a texture you like and want to generate similar variations, you can copy its seed value and use it for subsequent generations. This allows for replicable results and fine-tuning.
4. Generate the Albedo Map
Once your prompt and settings are dialed in, press "Generate Albedo." The AI will get to work, producing your initial texture maps.
- Preview in 3D Viewer: Click on any of your generated results to open the 3D Viewer. This allows you to see how the texture looks applied to a 3D object, giving you immediate visual feedback.
- 3D Viewer Display Settings: Within the viewer, you can adjust various display parameters to better evaluate your texture:
- Tiling: See how the texture repeats across a surface.
- Geometry: Apply the texture to different shapes (Sphere, Plane, Cube, Cylinder) to assess its deformation and seamlessness.
- Metallic, Roughness, Env Intensity, AO Intensity: Adjust these to visualize the texture's PBR (Physically Based Rendering) properties in different lighting conditions.
- Environment, Background: Change the surrounding lighting and background color to further test the texture's appearance.
- Texture Maps Settings: Scenario also offers real-time adjustments for conceptual PBR properties:
- Raised (height/elevation): Simulate bumps and depressions.
- Shiny (surface sheen): Control specularity.
- Polished (texture finish): Affect overall smoothness.
- Angular (edge sharpness): Define crispness of details.
- Image Details: The right panel provides all the metadata for your generated texture: the exact prompt used, the model, dimensions, and creation date. From here, you can also enhance or tag your textures for better organization.
5. Generate the PBR Maps
An albedo map is just one component of a complete texture set. To achieve true realism in 3D applications, you'll need a full suite of PBR maps.
- Click "Generate Maps": This action will create the essential PBR maps: height, normal, metallic, edge, and ambient occlusion. These maps provide crucial information about a surface's physical properties, allowing 3D engines to render it accurately under various lighting conditions.
- Invert Maps (if needed): Sometimes, a height map might generate with its "raised" areas appearing "sunken" and vice-versa. You might need to "Invert" maps (e.g., for height) to ensure they correctly represent the texture's physical pattern in your chosen 3D software.
Scenario in Action: Practical Examples
Let's look at how these steps translate into real-world texture creation:
- Ancient Stone Wall:
- Model: Hand-Painted Textures.
- Prompt: "A hand-carved ancient stone wall texture, featuring irregular block patterns in varying shades of aged gray and moss-green, with subtle cracks and weathered details that reflect a historic, timeworn surface."
- Result: You'd get high-quality, stylized stone wall textures perfect for a cartoon interior or a fantasy game environment, showcasing irregular, painterly details.
- Weathered Wooden Fence:
- Model: Realistic Textures 2.0.
- Prompt: "A weathered fence texture featuring rough, splintered wood in faded tan and gray hues. The planks show signs of warping with frayed edges and natural grain patterns enhanced by sun and rain exposure, evoking a rustic countryside ambiance."
- Result: This would produce highly detailed, realistic wooden fence textures, complete with splinters, faded paint, and visible wood grain, ideal for a rustic countryside scene.
Scenario offers robust capabilities for serious texture artists. But what if you're just starting out or need something simpler?
Smooth Sailing: Generating Textures with Spellai (Perfect for Beginners)
Spellai is an AI texture generator that prioritizes ease of use, making it an excellent choice for those new to the world of AI art. It offers various styles, creation modes, and even community features to share your creations.
Step-by-Step Guide to Generating Textures Using Spellai
Getting started with Spellai is incredibly intuitive:
1. Choose Spellai and Select a Style
Access the Spellai tool. One of the first choices you'll make is the generation mode. Select "Genius" mode, which offers more creative flexibility, and then pick the "General" style. This provides a balanced starting point for a wide range of texture types.
2. Pick Your Preferred View
Within the "Easy Models" section, navigate to the "View" tab. Here, you'll select "From Above." This perspective is often ideal for generating seamless textures that look natural when applied to a surface, as it removes any artificial perspective distortion.
3. Insert Your Prompt
This is where you tell Spellai what to create. Enter your prompt (e.g., "a white marble texture, high resolution").
- Enhance with References: You can also add a reference image to give the AI a visual starting point, which is fantastic for matching existing styles or materials.
- Negative Prompts: Use a negative prompt to tell the AI what not to include (e.g., "blurry, low resolution, seam").
- Number of Outputs: Before clicking "Create," select the number of desired outputs to generate multiple variations at once.
4. Export Your Masterpiece
Once the AI has worked its magic, your generated texture will appear. You can then easily save your new texture to your device, ready for use in your projects. Spellai also offers the option to share your creation with its community, fostering inspiration and collaboration.
Recommended Prompts for Spellai
Spellai shines with clear, concise prompts. Here are a few examples using "Genius" mode and the "From Above" Easy Model:
- "Wood; a rich texture, high resolution" – Expect a beautiful wooden texture with impressive depth.
- "a white marble texture, high resolution" – This prompt often yields a dreamlike, elegant marble texture.
- "a soft fabric texture, high resolution" – Generate vivid, natural-looking fabric textures, complete with subtle weaves.
- "a natural texture, grass texture, high resolution" – Perfect for creating lush, detailed grass for any outdoor scene.
Beyond the Basics: Pro Tips for Next-Level Textures
Once you've mastered the fundamentals, a few advanced strategies can help you consistently produce exceptional results and truly leverage these powerful tools.
Refine Your Prompts Like a Sculptor
Think of prompt engineering as digital sculpting. You start with a rough block, then gradually carve out details.
- Start Broad, Then Detail: Begin with a general idea ("stone wall"). If the result is close, iterate by adding specifics ("ancient stone wall, composed of large, timeworn limestone blocks, displaying erosion, gray and sandy tones, moss between stones").
- Use Adjectives and Verbs: "Rough," "smooth," "polished," "eroded," "cracked," "splintered," "vibrant," "faded" – these words breathe life into your descriptions.
- Consider Context: Where would this texture be found? What's its history? Incorporating these elements into your prompt can guide the AI to more coherent and convincing outputs.
- Experiment with Order: Sometimes, placing the most important descriptive terms at the beginning of your prompt can give them more weight.
Understand the Nuances of PBR Maps
Generating PBR maps is powerful, but understanding their function helps you troubleshoot and fine-tune.
- Albedo/Diffuse: This is the base color and brightness of the surface, without any lighting information.
- Normal Map: Creates the illusion of surface detail (bumps, grooves) without adding extra polygons. If your normal map looks odd, check if it needs to be inverted or if your 3D software is interpreting it correctly.
- Height/Displacement Map: Similar to a normal map but uses grayscale values to literally displace the mesh, creating actual geometric detail (though often computationally intensive).
- Roughness Map: Dictates how rough or smooth a surface appears, affecting how light scatters. A rough surface diffuses light; a smooth surface reflects it clearly.
- Metallic Map: Defines which parts of a surface are metallic and which are dielectric (non-metallic).
- Ambient Occlusion (AO) Map: Simulates soft shadows where objects or parts of an object are close together, adding realism.
Knowing what each map does helps you debug issues, like why a texture looks too shiny or too flat in your 3D render.
Embrace Iteration and Experimentation
AI generation is rarely a one-shot process. Be prepared to generate multiple variations, adjust prompts, tweak settings, and try again. Each iteration is a learning opportunity. Don't be afraid to push the boundaries of what you think is possible. Perhaps you're looking for something that perfectly complements a custom asset, like when you Generate Minecraft textures online and need a unique block texture that stands out. The iterative nature of AI tools makes this kind of detailed refinement not just possible, but efficient.
Leverage Community and Resources
Many AI texture generators, like Spellai, have thriving communities. Sharing your work, asking questions, and learning from others can rapidly accelerate your progress. Additionally, online tutorials and documentation are invaluable resources for mastering advanced features and troubleshooting common issues.
Your Journey to Stunning Visuals Starts Now
The world of digital content creation is constantly evolving, and AI texture generators are at the forefront of this revolution. By following these step-by-step guides to using texture generators, you're not just learning a new tool; you're acquiring a superpower that will dramatically enhance your creative workflow and the quality of your visual output. Whether you're crafting immersive game worlds, designing architectural marvels, or simply adding a professional touch to your social media, these tools offer unparalleled efficiency and artistic freedom. Dive in, experiment, and prepare to be amazed by the stunning visuals you can create.